How About A Little Diy!
Always Work To Be Done!
Now we've decided on doing mostly everything ourselves! The reason for that is because we know what we want to achieve and how we want to achieve it!
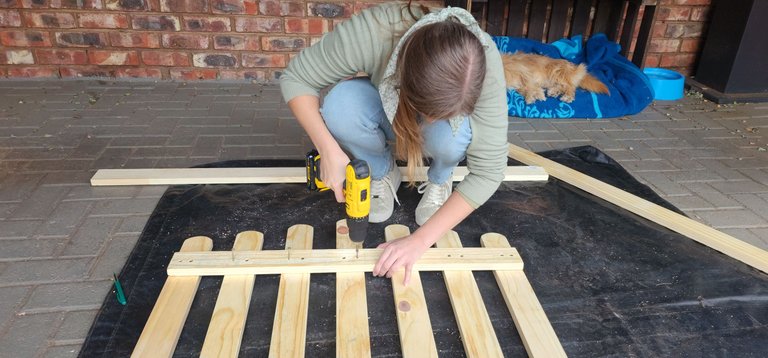
So while the Fiance went on inside adding crack filler to all our cracks! I went outside and started building the doggy gate Yeahp! The dogs get a gate!
Absolutely can not leave them to roam the entire house throughout the day! They be naughty!

The Has To Haves!
Is Haves spelled right? Not sure, but who cares right? We're here to build a gate!
So we actually bought the wood some weeks ago and had it precut into smaller pieces to fit in my car! Yeahp I don't have a pickup! Anyways!
Well wood was the main thing we needed right... and then of-course tools to work with!
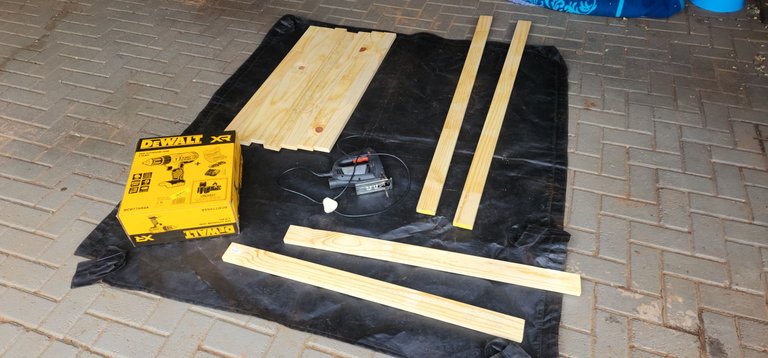
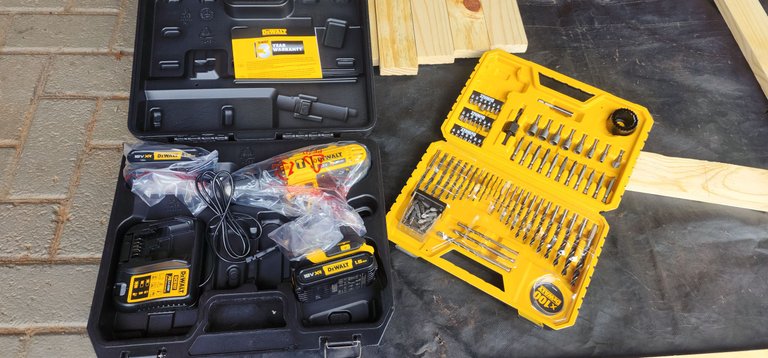
We bought some new tools!
Oh yes! I feel like a kid again! With my new cordless drill and the toys that come with it! HELL YEAH! This is going to be a fun project! Without a doubt!
I absolutely am beyond excited at this point! Now here's the thing! I always use to do woodwork until I fell into the mechanic trade and to be honest doing this now made me realize how much I miss this and how much fun this is!
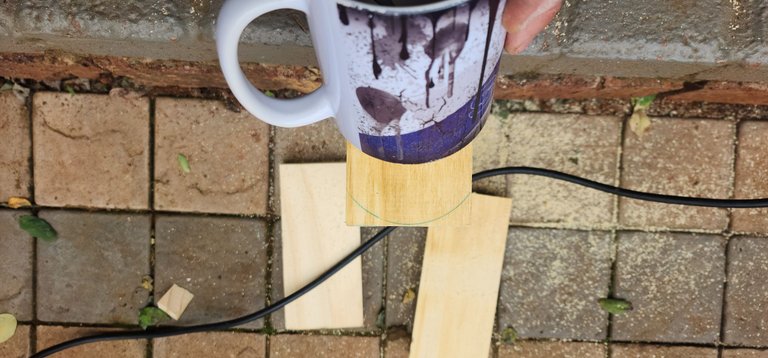
Even a mug can help!
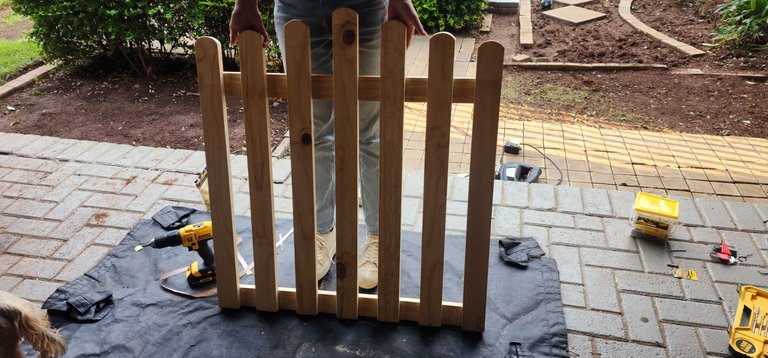
Yeahp I decided to give the tops a little bit of a round cut to them! Could not have the gate too boring now could we!
Getting The Shape!
These things usually tend to be thought of as wild, I mean any job in particular. Until you actually start with it and realize how easy these things really are and how much more cooler things can look if you add a little effort!
Okay so getting the main shape was the first thing I wanted, then it was down to actually taking the inside size and measuring how far those planks had to be from each other! Some math required!
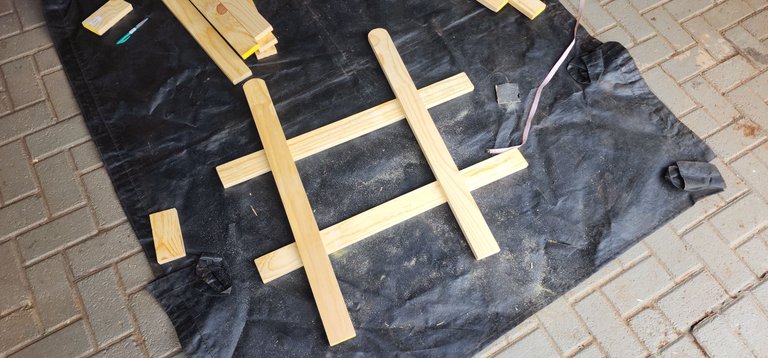
There we go, shape in shape!
Now to cut the rest of those planks!

Now I added the planks to see how the picture is coming along!
This is where I got the idea to not make all the planks the same length, I decided there that I am going to make a nice curve on the top!
This is where effort comes in! Put more effort in for your own things especially!
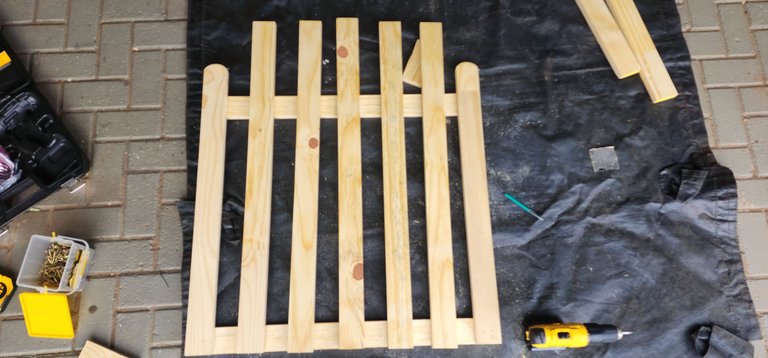
Looks Great!
Well at the very least it looks great for me! It could have been a flat top and something that was beyond boring!
However I did make them a little shorter afterwards again! Not sure if this was the pre or after photo. but it came out pretty decent!

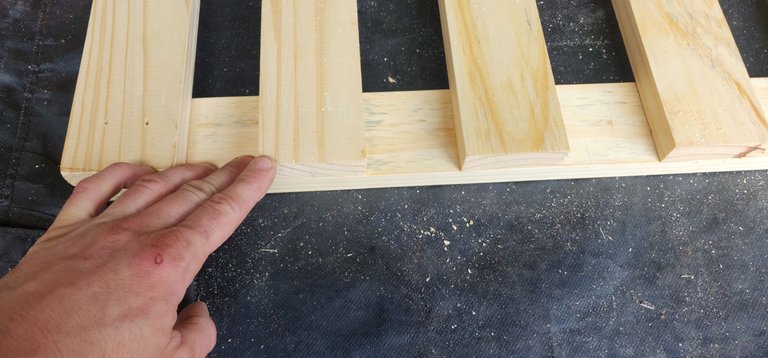
Now it was down to measuring the gaps in between!
The planks are not yet stuck at this point I can still move them around but the formula was simple.
I had 5 planks which meant six gaps would show. What I did then was measure the planks and got X which I multiplied by 5.
Then I took the length of the gap in between the two outer planks and then I subtracted the 5 plank widths from the gap size.
That gave me X, I then took X and divided it by 6. Easy to know the distance between each plank! I mean if I walk into the house and see one plank out of place each day I would get really pissed!
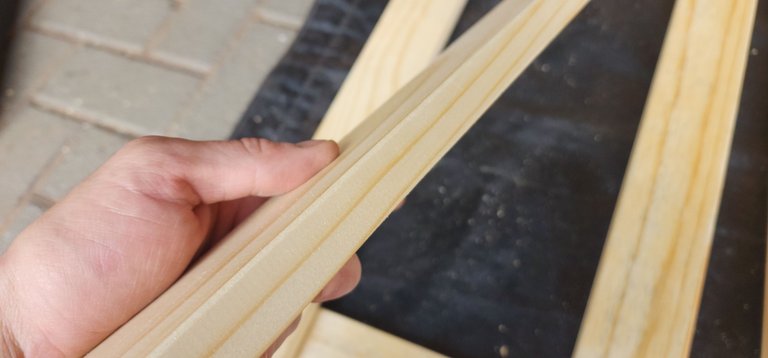
I also took the effort to round of the edges of the planks to give it that nice smooth finish!
Ahhh I be proud of this now!
The Fiance even helped me to add some of the screws, I mean how could I deny the awesome help I get! For sure I would accept that and then she can have some joy of helping with the gate!
Now we both built the doggy gate!
It's Built!
Now I have to say we are not yet entirely done! I still need to make this go into the house with some wheels on it and there is still a guide to be built as well! We will get to it tomorrow though!
The day ran out and we still needed to get some wheels and hiltis to mount the sliders with, I am however going to use some of the wood that remained for the sliders. Saving and cutting on costs!
We are also going to give it a nice finish with varnish too!


Connecting the people of #HIVE across South Africa. #hive